
10 Tips for Choosing the Best Repair Equipment?

Choosing the right Repair Equipment can shape the quality, safety, and speed of every service job. A professional workshop needs more than attractive product photos or low prices. It needs tools that match the repair type, user skill, workload, and working environment. A torque wrench should offer clear readings, while a diagnostic device should provide dependable software support. Small details matter. A loose connector can waste an entire afternoon.

These ten practical tips draw on common workshop experience, manufacturer guidance, and careful equipment comparison. They consider durability, accuracy, maintenance, compatibility, training, warranty coverage, and long-term value. Equipment should support technicians, not create new problems. Check specifications carefully. Test the controls. Ask how replacement parts are supplied. Reliable brands should explain their testing methods and publish clear safety instructions. Independent reviews can help, but they should not replace hands-on inspection.

No checklist is perfect. I have seen buyers choose impressive features and overlook poor lighting, awkward storage, or unavailable calibration services. That mistake becomes expensive over time. A compact tool may suit a mobile technician, but it may frustrate a busy workshop handling constant repairs. The best decision balances real experience with verified information. Think about tomorrow’s workload, not only today’s discount. With a careful process, Repair Equipment becomes a dependable investment that improves consistency, protects users, and supports professional results. Performance still needs regular review. Equipment changes, and your needs may change too.
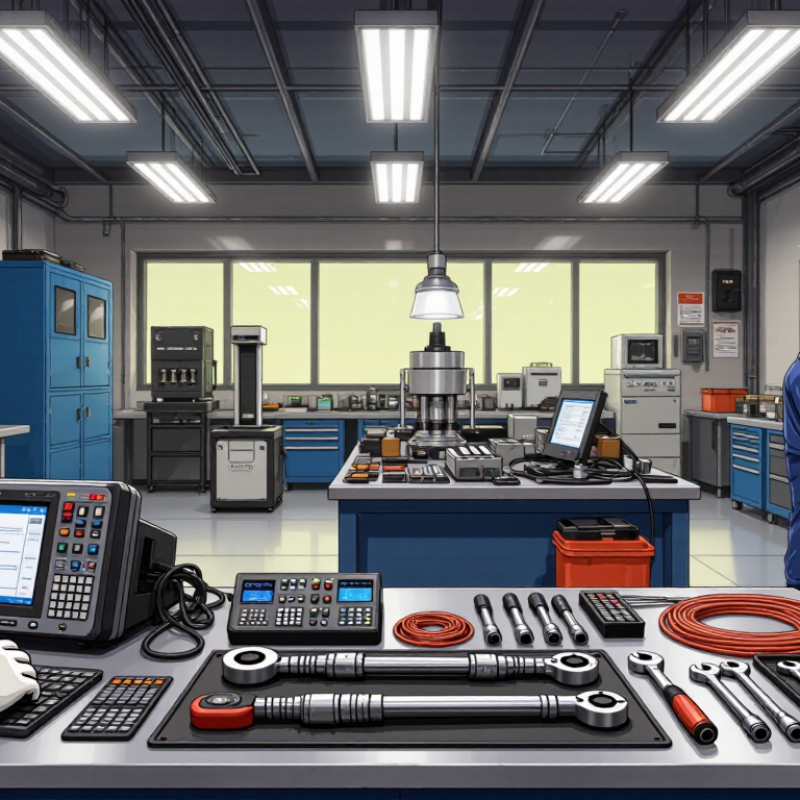
10 Tips for Choosing the Best Repair Equipment?

Define the Repair Task and Identify the Required Equipment

Choosing repair equipment starts with a precise description of the repair task. “Fix the machine” is too vague to guide a safe purchase. Record the equipment type, fault symptoms, working material, access space, and expected repair frequency. A cracked aluminum housing needs different tools than a seized steel bearing. Include measurements, torque ranges, temperature limits, and power requirements. Small details matter.

I normally inspect the work area before opening a catalog. A narrow service panel may require stubby drivers, flexible extensions, or compact lighting. A hydraulic repair may need calibrated gauges, clean fittings, seal tools, and spill-control materials. Electrical diagnosis often requires meters with suitable measurement ranges and insulated probes. Match every tool to the task, not to a generic tool list. Check manuals and maintenance records when available. They reveal hidden constraints.

Separate essential equipment from convenient accessories, then verify compatibility with existing tools. Confirm capacity, accuracy, guarding, replacement parts, and operator training. Cheap equipment can create repeat failures. Expensive equipment can remain unused. I once selected a tool by maximum force alone and overlooked its awkward handle; the repair took longer and caused hand fatigue. That mistake changed my checklist. Test ergonomics with gloves, estimate setup time, and allow room for cleaning and inspection. If the task remains uncertain, pause and obtain a qualified assessment before buying.

Check Equipment Compatibility, Quality, and Safety Features

Choosing repair equipment requires more than comparing prices. Check compatibility first: voltage, connector type, torque range, software requirements, and available replacement parts must match your repair process. A tool may look universal, yet a mismatched adapter can damage a circuit or create unstable readings. Test equipment with a known working component before using it on a costly unit. Small details matter.

Quality should be visible in calibration records, material strength, measurement accuracy, and service documentation. The U.S. Bureau of Labor Statistics recorded about 2.6 million nonfatal workplace injuries and illnesses in private industry during 2023. Reliable equipment cannot remove every risk, but it can reduce avoidable errors. Look for clear instructions, durable insulation, readable displays, and calibration support. Cheap tools often become expensive after repeated replacement.

Safety features deserve direct inspection. Lockout controls, overload protection, automatic shutoff, grounded construction, and heat-resistant handles are practical safeguards. OSHA estimates that proper lockout/tagout practices prevent about 120 deaths and 50,000 injuries annually. That figure should influence purchasing decisions. Do not trust a safety label alone. Check the manual and test the feature. I would also record inspection dates, although this step is easy to forget. A rushed purchase can still happen, especially during urgent repairs. That is where careful judgment matters most.

Compare Performance, Durability, and Ease of Maintenance

10 Tips for Choosing the Best Repair Equipment

Compare performance before price.

Tip 1: Check torque, load capacity, accuracy, and operating speed against real repair tasks.
Tip 2: Review independent test data, not only supplier claims.
Tip 3: Choose equipment that maintains stable output after repeated use.
Tip 4: Test power consumption under normal workloads.
Tip 5: Select tools with clear calibration requirements.

The U.S. Department of Energy reports that compressed-air leaks can waste 20–30% of compressor output, showing why efficiency deserves measurement.

Durability appears in small details.

Tip 6: Inspect housing materials, seals, cables, and moving joints.
Tip 7: Ask for cycle-test results and failure-rate records.
Tip 8: Confirm spare-part availability before purchase.

In field repairs, downtime often costs more than the original tool.

The Deloitte 2023 Smart Manufacturing and Operations Survey found that 86% of manufacturing leaders consider smart manufacturing important for competitiveness, but connected equipment still fails without disciplined maintenance.

Digital features help. They are not magic.

Ease of maintenance should be visible on day one.

Tip 9: Prefer accessible filters, removable guards, and standard fasteners.
Tip 10: Calculate cleaning time, calibration fees, training hours, and expected repair intervals.

A five-minute inspection matters. I once favored a powerful unit with awkward access panels; that choice created avoidable delays.

The lesson is uncomfortable: performance scores can hide maintenance friction.

Record noise, heat, vibration, and setup time during a realistic trial. Then compare those notes with the published specifications.

Evaluate Costs, Warranties, and Long-Term Value

10 Tips for Choosing the Best Repair Equipment

Purchase price rarely shows the full cost of repair equipment. Check energy use, replacement parts, calibration fees, and expected service life. A cheaper machine may need frequent adjustments, creating delays and frustrated technicians. Ask the supplier for a written estimate covering delivery, setup, training, and routine maintenance.

Read the warranty carefully. Confirm which components are covered, how long coverage lasts, and who pays shipping. Some warranties exclude wear parts, software faults, or damage caused by improper installation. That small sentence can change the entire budget. Request service response times in writing, especially if one broken tool can stop daily operations.

Test equipment with the materials and workloads used in your shop. Measure accuracy after repeated cycles, not only during a short demonstration. In my workshop experience, comfortable controls reduced mistakes more than impressive specifications. I once chose a lower-priced unit and ignored its limited support network. The repair costs were manageable, but the lost time was not. That decision still influences my buying checklist.

Compare total ownership costs over three to five years. Include electricity, consumables, technician training, downtime, and disposal. Reliable documentation matters because clear maintenance schedules protect performance and user safety. Ask experienced operators what fails first. Their answers may differ from sales materials. Keep those differences visible before signing a purchase agreement.

10 Tips for Choosing the Best Repair Equipment? - Evaluate Costs, Warranties, and Long-Term Value

No. Evaluation Area Practical Tip Data to Collect Cost or Value Metric Warranty and Service Check Long-Term Value Indicator
1 Define the Repair Task Match the equipment to the required repair type, material, tolerance, workload, and operating environment. Required capacity, accuracy, duty cycle, compatible materials, electrical requirements, and workspace limits. Avoids paying for unused capacity or buying equipment that cannot complete the intended work. Confirm that the stated specifications are covered by the written warranty. A close match between capability and actual workload generally reduces misuse, rework, and premature wear.
2 Compare Total Cost of Ownership Look beyond the purchase price and calculate the full cost over the planned service period. Purchase price, installation, training, consumables, maintenance, energy, downtime, and disposal costs. TCO = purchase price + operating costs + maintenance + downtime − resale or residual value. Check whether labor, shipping, diagnostic fees, and replacement parts are included or excluded. Lower TCO is usually more meaningful than a lower initial price.
3 Verify Accuracy and Repeatability Separate measurement accuracy from repeatability and request test conditions for both. Stated tolerance, repeatability, resolution, calibration method, and test temperature or load. Poor accuracy increases inspection time, rejected work, and correction costs. Determine who pays for calibration, adjustment, and certification after service. Documented calibration records and traceable testing support consistent repair quality.
4 Assess Build Quality and Safety Inspect the frame, controls, guarding, cables, connectors, emergency features, and documentation. Material quality, load rating, safety features, ingress protection, noise level, and user-maintenance access. Safety-related failures can create injury, rework, compliance, and interruption costs. Confirm warranty exclusions for misuse, overload, unauthorized modification, and wear items. Robust construction and accessible safety controls can reduce failure risk and training time.
5 Examine Warranty Coverage Read the complete warranty instead of relying on the headline warranty period. Coverage duration, covered components, labor, transport, exclusions, claim process, and response commitments. Estimate the repair expense that would otherwise be transferred to the buyer. Prefer clear written terms with defined remedies, service procedures, and claim documentation. A transparent warranty reduces financial uncertainty and helps forecast ownership risk.
6 Check Parts and Service Availability Confirm that essential spare parts, technical support, manuals, and qualified service are accessible. Parts list, quoted lead times, service locations, diagnostic support, and availability of repair procedures. Downtime cost = hours unavailable × lost contribution per hour. Ask how long parts and service support are expected to remain available. Supportability often determines whether equipment remains useful after the warranty ends.
7 Calculate Maintenance Requirements Review preventive maintenance tasks, inspection intervals, lubrication needs, and calibration requirements. Maintenance frequency, technician hours, consumable quantities, replacement intervals, and service-kit prices. Annual maintenance cost = scheduled service + consumables + calibration + expected corrective repairs. Confirm which maintenance actions are required to keep the warranty valid. Simple, documented maintenance usually supports predictable performance and longer service life.
8 Evaluate Usability and Training Choose controls, displays, instructions, and setup procedures that reduce operator error. Setup time, learning time, number of operators, documentation quality, and required qualifications. Training cost = training hours × labor rate + production time unavailable during training. Check whether training materials and technical assistance are included. Intuitive operation can improve consistency, reduce setup errors, and shorten employee onboarding.
9 Review Compatibility and Upgrade Options Confirm compatibility with existing tools, power systems, software, fixtures, and workflow requirements. Interfaces, adapters, accessory costs, software support, update policy, and expansion capacity. Compare the cost of upgrading the current system with replacing it later. Ask whether upgrades affect warranty coverage or require authorized installation. Modular equipment can delay replacement when repair volumes or technical requirements change.
10 Estimate Payback and Residual Value Use realistic workload, productivity, repair-quality, and resale assumptions before making the final decision. Expected jobs per period, contribution per job, hours saved, reduced rework, useful life, and estimated residual value. Payback period = net investment ÷ expected periodic savings or additional contribution. Confirm transferability of warranty, service records, and support if the equipment is resold. Strong documentation, service history, maintainability, and continued parts support can protect residual value.
Decision rule: Select the equipment with the best combination of task fit, verified performance, supportability, warranty protection, total cost of ownership, and expected service life—not necessarily the lowest purchase price.

Select the Best Equipment and Verify Its Practical Fit

10 Tips for Choosing the Best Repair Equipment?

Select the Best Equipment and Verify Its Practical Fit

Repair equipment should match the job, workspace, and people using it. A powerful tool can still fail when benches are narrow or power access is limited. Measure the work area, check material types, and record the most common repair tasks. I once selected equipment based on specifications alone. It performed well, but its heavy frame slowed daily work. That mistake changed how I evaluate practical fit.

Tip 1: Test before purchasing. Place the equipment on the actual workbench. Check reach, visibility, noise, heat, and control comfort. Ask technicians to complete a normal repair, not a demonstration task. Their feedback often reveals awkward handles, unclear displays, or poor access.

Tip 2: Verify accuracy and repeatability. Use reference samples and inspect several results. A tool that works once may not remain stable throughout a busy shift. Review adjustment steps, calibration needs, and measurement records. Independent technical guidance can help confirm whether the claimed performance suits your repair standards.

Tip 3: Examine maintenance demands. Replaceable parts should be accessible, documented, and reasonably priced. Cleaning should not require dismantling half the machine. Safety guards, emergency controls, and training materials also deserve careful inspection. Do not ignore storage conditions. Dust, humidity, and vibration may reduce service life.

Leave room for doubt. A familiar method may seem cheaper, yet hidden downtime can change the calculation. Trial periods, technician training, and written acceptance checks provide stronger evidence than attractive specifications. Practical fit is proven during ordinary work, under real pressure.

CONTACT US